

Hanna Marine Salinity Tester (HI98319): Calibration, Use and Care
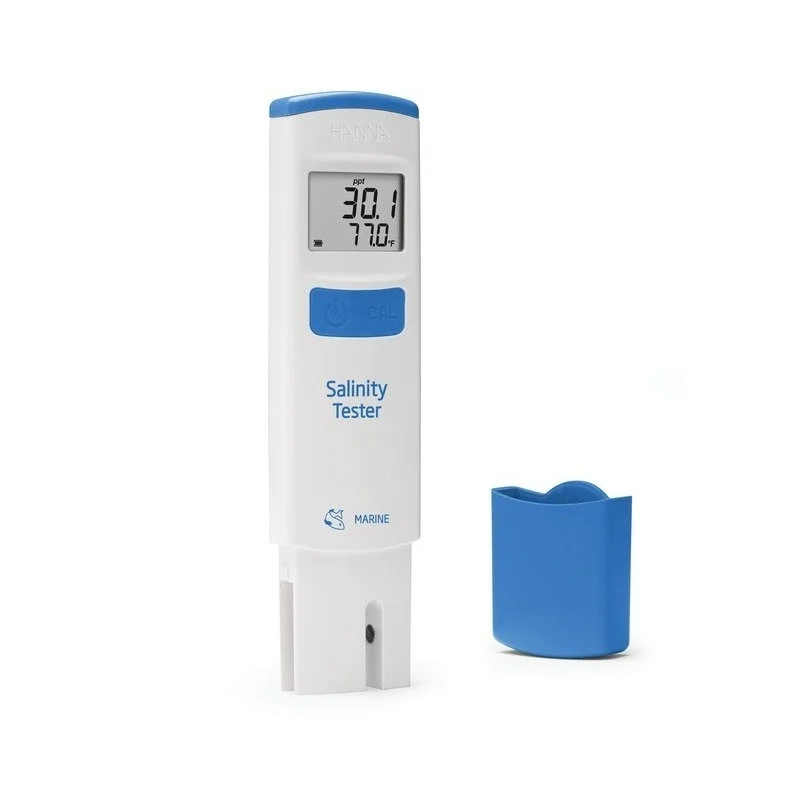
Hanna Marine Salinity Tester Calibration and Use
Salinity tester calibration matters: accurate salinity allows your fish and corals more time to grow instead of having to adjust to constant salinity changes. The Hanna salinity meter provides readings accurate to ±0.001 Specific Gravity or ±1 PPT, making it one of the most reliable tools for reef keepers.
Water quality · Detailed tutorial · About 6 minutes · Beginner friendly
The key habit: Calibrate monthly with regular use or more often with frequent use, and always rinse and dry the probe after each use to keep it functioning accurately.
Shop the Hanna Marine Salinity Tester (HI98319)
In this guide
- What the Hanna HI98319 does and why it matters
- Gathering your supplies and checking your battery
- Calibrating the tester before first use
- Taking daily salinity readings
- Rinsing and storing your tester
- When to replace the battery
- Troubleshooting common issues
1. What the Hanna HI98319 Does
The Hanna Instruments HI98319 Marine Salinity Tester measures electrical conductivity (EC) to determine the salinity of natural and artificial seawater. Within seconds, the salinity and temperature are measured, and then using the temperature reading, automatically compensated and displayed on the easy to read LCD screen. The meter displays results in ppt (parts per thousand), PSU (practical salinity units), or S.G. (specific gravity), so you can use whichever unit your tank keeper prefers.
Saltwater aquarium pets rely on a stable salinity level to survive and even the smallest swings in salinity can cause trouble for your fish, coral, and invertebrates. Testing weekly keeps drifts small and catches problems early [1].
2. Gathering Your Supplies and Checking the Battery
Gather before you start
- The Hanna HI98319 tester with protective cap
- 5.00 ppt salinity calibration standard (2 sachets) and 35.00 ppt salinity calibration standard (2 sachets), which come in the box
- Purified or RO/DI water for rinsing
- A container or small beaker for calibration
- Tank water sample at room temperature
The tester features a battery life-percentage indicator. When you press the ON/OFF button, check the percentage shown on the screen before calibrating or testing.
3. Calibrating Before First Use and Monthly
Calibration is the single most important step. The tester prompts "35.00 PPt USE" and automatically recognizes the solution. Here's how:
Step 1: Prepare the probe
Rinse the tester with purified water before calibration and dry completely.
Step 2: Open a calibration sachet
Use a fresh calibration standard for each calibration. Tear open one 35.00 ppt sachet and pour it into a small, clean container.
Step 3: Enter calibration mode
Power ON the device using the ON/OFF button. The meter will display "35.00 ppt USE" message, with the CAL tag blinking. Press the CAL button to begin.
Step 4: Dip and wait
Place the tester in the sachet (some solution may overflow). Swirl the tester to dislodge any air bubbles. Wait for "REC" message, which shows the solution is stable.
Step 5: Confirm and store
Continue to wait until the display shows a "Stor" message, indicating that the device accepted the measurement. The tester returns to normal mode automatically. The calibration is complete.
4. Taking Your Daily Salinity Readings
Measuring salinity is quick and simple once the tester is calibrated.
Step 1: Power on the tester
Press the ON/OFF button. The screen wakes within a second.
Step 2: Take a water sample
Use tank water or sump water at room temperature. Always test your water at the same temperature as your tank to ensure accuracy.
Step 3: Dip and tap
Insert the tip of the meter into the aquarium water. Tap to dislodge air bubbles. Wait two to three seconds.
Step 4: Read the result
The large numbers at the top are your salinity reading. The smaller numbers at the bottom show temperature. Both appear within seconds and remain stable once air bubbles are cleared.
Check your target range: Reef aquariums generally perform best at natural seawater levels of 1.025–1.026 specific gravity or 32–35 ppt. Consistency matters more than hitting an exact number. A tank stable at 1.024 is healthier than one that swings between 1.023 and 1.026 [1,2].
5. Rinsing and Storing Your Tester
Keep the probe clean and the display dry.
After each use:
Rinse the probe with purified water and dry off. Always replace the protective cap after each use.
Never leave the tester sitting wet or exposed to direct sunlight. The probe is graphite and can be damaged by salt buildup or dehydration.
6. Replacing the Battery
The tester uses a CR2032 Li-ion battery for up to 100 hours of continuous use. The tester features a battery life-percentage indicator. When the screen shows a low percentage, replace the battery.
The battery compartment is typically on the back of the meter. Consult the instruction manual for the exact location and steps.
7. Why Readings Change and How to Spot Drift
If your reading seems wrong, check these things in order:
- Is the calibration recent? It is best to reference the meter often and calibrate for accuracy at least monthly so be sure to always have a substantial supply of 35 ppt calibration solution on hand.
- Is the probe clean? Salt crust or film on the graphite sensors throws readings off. Gently rinse with purified water and dry.
- Is the sample at room temperature? Salinity is temperature-sensitive. Always test your water at the same temperature as your tank to ensure accuracy.
- Does the tester need a new battery? Check the battery indicator on the screen.
What you notice and what to check next
| What you notice | What to check next |
|---|---|
| Reading seems lower than expected | Calibrate with fresh 35 ppt standard; check that probe is clean and dry |
| Reading jumps around | Make sure air bubbles are cleared; wait 2–3 seconds for stabilization |
| Tester won't turn on | Replace the CR2032 battery; check that cap was removed |
| "Error" shows on screen | Rinse probe with purified water and dry; recalibrate if error persists |
| Reading differs from your old hydrometer | Old swing-arm hydrometers are notoriously inaccurate; the Hanna is more reliable |
Your care log
Calibrated on: ______ Calibration standard used: ______ (35 ppt)
Battery replaced on: ______ Battery type: CR2032
Tank salinity target: ______ (ppt or S.G.) Checked on: ______
Notes: _________________________________________________________________
Sources
Checked November 4, 2026.
1. Hanna Instruments, "HI98319 Waterproof Salinity Tester Instruction Manual"
2. Bulk Reef Supply, "BRStv Product Spotlight – Hanna Instruments Salinity Tester"
3. Bulk Reef Supply, "HI98319 Marine Salinity Tester"
4. Bulk Reef Supply, "How to Calibrate & Use the Hanna Instruments Marine Salinity Tester"
5. Reef Supply, "HI98319 Hanna Marine Salinity Tester Review"
6. Bulk Reef Supply, "Managing Salinity Swings in Saltwater Aquariums"