

Assorted LPS Mix Frag Pack Care: Acclimation, Placement, Feeding and Coral Compatibility
Tropical Fish & Coral / Coral care guides
10 Assorted LPS Mix Frag Pack Care: Acclimation, Placement, Feeding and Coral Compatibility
After reading this guide, you’ll know how to introduce ten assorted large-polyp stony corals safely, match their individual lighting and flow needs, prevent coral stings, and help your new reef additions settle in.
October 17, 2026 · Coral care · Detailed tutorial · About 10 minutes · Beginner–intermediate
The key habit: Treat every frag as an individual coral—not as one interchangeable set. Identify it, place it conservatively, and give it enough distance from neighbors to expand safely.
Shop the 10 Assorted LPS Mix Frag Pack →
In this guide
- What comes in an assorted LPS frag pack
- Prepare your tank before delivery
- Unpack, inspect and acclimate the 10 frags
- Lighting: start low, then adjust by species
- Water flow and placement
- Spacing and coral aggression
- Water parameters and stability
- Feeding a mixed LPS collection
- Your first 14 days
- Troubleshooting and signs of health
1. What comes in an assorted LPS frag pack
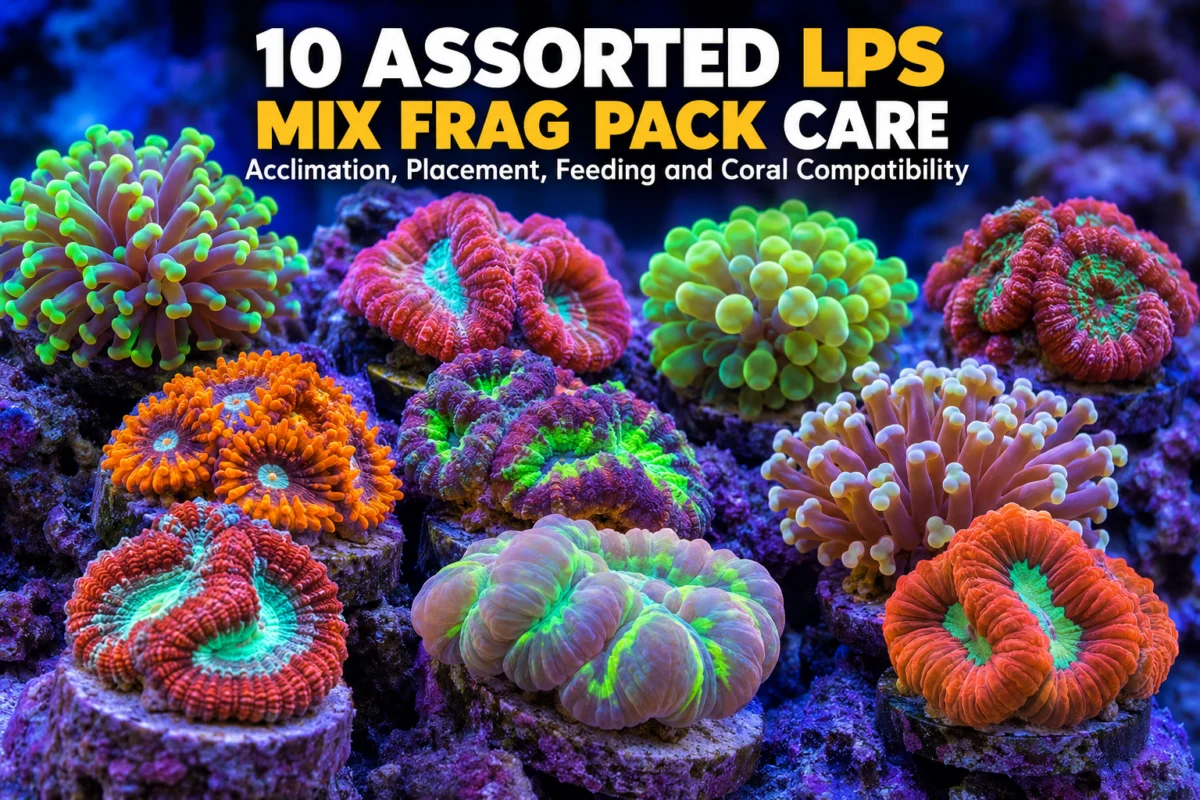
Large-polyp stony (LPS) corals build calcium-carbonate skeletons and typically display substantial fleshy tissue. This product includes 10 assorted LPS coral frags; the exact species, colors and sizes are not specified. You may receive different forms and growth habits, so identify each frag before choosing its permanent home.
Examples of common LPS groups include Micromussa (often sold as acans), Duncanopsammia (Duncans), Euphyllia and Fimbriaphyllia (torch, hammer and frogspawn corals), Caulastrea (candy cane), and various fleshy brain corals. These are examples, not a guaranteed contents list.
2. Prepare your tank before delivery
Use a cycled, established saltwater aquarium with stable temperature, salinity and reef chemistry. Make room for ten separated placements rather than crowding every frag onto one rock.
- Prepare a clean inspection station, specimen containers, coral-safe gloves, eye protection and a coral rack or secure low-light holding areas.
- Check your refractometer calibration, temperature, alkalinity and available space before shipment arrives.
- Keep coral dip, rinse containers and an observation/quarantine system on hand if your husbandry protocol uses them.
- Identify aggressive neighbors and powerhead jets; plan shaded or moderate-light introduction zones.
Important: new coral should never go into a tank with measurable ammonia or nitrite.
3. Unpack, inspect and acclimate the 10 frags
Gather before you start
- Thermometer and salinity tester
- Clean, aquarium-only containers and coral rack
- Gloves, eye protection and soft coral handling tools
- Optional coral dip used exactly as its manufacturer directs
- Unpack promptly. Keep each specimen identified and check bags for leaks, sharp temperature differences and obvious tissue damage. Follow the seller’s live-arrival instructions for any shipping concerns.
- Match temperature. Float sealed bags briefly in the aquarium or a temperature-controlled container without exposing coral tissue to the light.
- Check salinity. Compare shipping water with tank water. If they differ materially, carefully adjust using a controlled process appropriate to shipment duration and coral condition; avoid lengthy exposure to opened shipping water.
- Inspect and optionally dip. Inspect tissue, skeleton and plugs for hitchhikers. Dip only species appropriate for the chosen product and follow label dilution and exposure exactly. A dip does not replace quarantine and must not be poured into the display.
- Rinse and transfer. Rinse with clean saltwater when dip directions specify it; never add shipping or dip water to the display tank.
- Place temporarily. Use a low-to-moderate-light, indirect-flow frag rack or spacious sandbed position as appropriate for each specimen. Avoid putting delicate flesh against abrasive rock or sand.
- Observe. Reduced expansion during the first day can be normal, but rapid tissue loss or severe discoloration needs prompt attention.
Shipping caution: prolonged drip acclimation after opening a long-shipped bag can increase ammonia-related risk as pH rises. Prioritize safe temperature/salinity matching and the shipper’s instructions; do not use one fixed acclimation time for every shipment.
4. Lighting: start low, then adjust by species
Many LPS corals adapt to roughly 50–150 PAR as an initial holding range, but requirements vary substantially. Certain specimens prefer lower light, while others can thrive at higher PAR after acclimation. These numbers are starting guidance, not a universal requirement or target for every frag.
Start conservatively, check coral behavior, and change either light intensity or placement gradually over days to weeks. Pale or shrinking tissue may reflect light stress, but can also result from unstable water or physical injury. Use a PAR meter if one is available; visual brightness is unreliable under blue-heavy reef lighting.
5. Water flow and placement
Most fleshy LPS benefit from gentle to moderate, indirect, varied flow: enough to bring fresh water and remove debris without pulling tissue hard against the skeleton. Put flowing or branching species where polyps sway naturally rather than whipping sharply. Avoid blasting fleshy brains or newly cut frags with a direct pump outlet.
Secure plugs so they cannot tip, and place fleshy, free-living corals on a clean stable surface where their tissue will not scrape. Do not permanently glue frags until you have confirmed identity, expansion, flow tolerance and spacing.
6. Spacing and coral aggression
Coral warfare is the biggest hidden risk in a mixed LPS pack. Some corals develop long stinging sweeper tentacles, often after dark. Start with generous spacing—commonly at least 4–6 inches between potentially aggressive neighbors—and increase this when you see long sweepers or have species known for greater reach. A fixed distance never guarantees safety.
- Inspect the tank with a dim red flashlight after lights-out to check nighttime extension.
- Do not assume hammer, frogspawn and torch corals can touch safely; compatibility varies, and torches can sting other euphylliids.
- Leave room for growth as well as current tissue expansion.
- If a coral repeatedly contacts a neighbor, relocate it before tissue damage develops.
7. Water parameters and stability
Consistency usually matters more than chasing a perfect number. The following are practical general reef starting ranges; individual species and mature systems may operate successfully outside them.
| Parameter | General target | Why it matters |
|---|---|---|
| Temperature | 75–79°F (24–26°C) | Avoid daily spikes and sudden changes. |
| Specific gravity | 1.024–1.026 | Match reliably with a calibrated instrument. |
| Alkalinity | 7–9 dKH | Supports skeletal growth; keep stable. |
| Calcium | 400–450 ppm | Required for stony skeleton formation. |
| Magnesium | 1250–1400 ppm | Supports balanced reef chemistry. |
| Nitrate | ~2–20 ppm | Avoid both sustained nutrient starvation and excessive levels. |
| Phosphate | ~0.03–0.10 ppm | Monitor alongside nitrate rather than stripping nutrients abruptly. |
| Ammonia / nitrite | Undetectable | Indicates a cycled, stable system. |
Because ten stony frags increase calcium and alkalinity demand as they grow, test regularly before adding supplements. Dose based on measured consumption, not a predetermined schedule.
8. Feeding a mixed LPS collection
Many LPS receive much of their energy from symbiotic algae under adequate lighting, and numerous species also capture food. Whether and how often to target-feed depends on the coral. For receptive polyps, offer small portions of suitable marine foods such as finely chopped mysis or purpose-made coral food, typically beginning with an occasional feeding once the frag has settled.
- Choose a time when feeding tentacles are visible or the coral shows a feeding response.
- Pause or reduce vigorous circulation briefly, without compromising the tank’s oxygenation.
- Gently deliver an appropriately sized amount near the polyp; do not force-feed an unresponsive coral.
- Resume circulation and remove uneaten food to prevent nutrient spikes.
Not every frag in the pack needs direct feeding, and large particles can injure small polyps. Observe each coral and adjust by species.
9. Your first 14 days
| When | Care priority |
|---|---|
| Arrival day | Inspect and acclimate, label the frags, begin conservative light and indirect flow. |
| Days 1–3 | Document tissue condition and polyp expansion; avoid repeated handling. |
| Days 4–7 | Identify species, check nighttime sweepers, and move any threatened neighbor. |
| Days 8–10 | Recheck major parameters and adjust lighting only if observations support it. |
| Days 11–14 | Choose more permanent positions for healthy, stable specimens; begin species-appropriate feeding if desired. |
These dates are a planning aid, not a deadline. Some shipped corals need longer to recover before relocation or feeding.
10. Troubleshooting and signs of health
| What you notice | What to check next |
|---|---|
| Polyps stay tightly retracted | Recent shipping, direct flow, overly intense light, fish or invertebrate harassment, salinity/alkalinity changes. |
| Tissue pulls back from skeleton | Contact stings, mechanical damage, parameter swings or possible disease; isolate and assess promptly. |
| Coral becomes very pale | Possible light stress, bleaching, or general health issue; verify PAR and chemistry before making gradual changes. |
| Brown slime or rapidly spreading tissue loss | Potential serious infection or necrosis; promptly isolate, document and seek experienced coral-health advice. |
| Neighboring frag shows localized damage | Check for nighttime sweeper tentacles; increase separation. |
| Unconsumed food remains on polyps | Reduce target-feeding amount or particle size and remove leftovers. |
Healthy signs include stable coloration, intact tissue, regular expansion appropriate to that species, and gradual new growth over time. Opening fully on the first day is not required.
Your care log
Date received: __________ Tank size: __________ Initial PAR zone: __________
Temperature: __________ Salinity: __________ Alkalinity: __________
Calcium: __________ Magnesium: __________ Nitrate: __________ Phosphate: __________
Frag IDs / names (1–10): ______________________________________________________________
First full expansion: __________ Nighttime sweeper check: __________
Feeding notes: ____________________________________________________________________
Final placements / spacing notes: ___________________________________________________
Sources
Checked October 17, 2026. Care ranges are broad introductory guidance and should be tailored to the actual species received.
- Bulk Reef Supply — How to Care for LPS Corals
- Bulk Reef Supply — Mixed Live Coral Pack guidance
- ReefCraftGuide — LPS Corals for Beginners
- Tropical Fish & Coral — 10 Assorted LPS Mix Frag Pack product details
Healthy livestock, informed reef keepers. Explore more care tutorials at TropicalFishAndCoral.com/tutorials.